Diy sound enclosure box for blender
Would you like to know how to make a DIY sound enclosure? If yes, then this is the right guide for you. We all know that the level of noise produced by a blender is quite loud. This may disrupt activities in an office or at home, especially if you are using a high-powered blender. A sound enclosure can prevent or reduce the noise level by containing the noise.
There is a wide range of enclosures that you can use. One of the options is purchasing a sound enclosure, which are generally built from heavy-duty materials such as steel. The enclosures are well-designed to reduce or prevent noise from both commercial and personal blenders. The cost of purchasing them is quite expensive and they are also bulky.
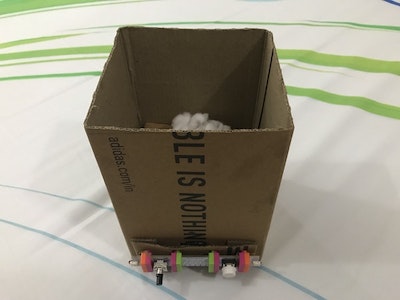
The other option is to build your own sound enclosure by using materials such as foam, rubber and other sound-absorbing materials. This is one way to save costs and also build an enclosure that suits your preferences. Though if not well-built, they may not be as effective as commercial sound enclosures.
Regardless of the method you use to enclosure sound, it is very important to have well-built ventilation. This allows free flow of air which will prevent the blender from overheating. Furthermore, you should follow the guidelines and also instructions for using your blender.
The main purpose of this guide is to show you the steps of how you can build your own sound enclosure. The process is very simple and easy to follow steps. The tools are also basic, some of which you have at home.
Let’s get started,

Related Article: What Is the Right Wattage for A Blender to Crush Ice?
Materials and Tools
To build your own DIY Blender sound enclosure, you will need the following:
- Saw (circular or table saw)
- Drill and drill bits
- Screwdriver or screw gun
- Staple gun
- Sandpaper or sanding block
- Measuring tape
- Pencil or marker
- Safety goggles and gloves
You will also need the following materials:
- Acoustic foam panels or any absorbing material for example- crare foam, acoustic blankets and more.
- Plywood or use MDF board ( This can be used on the frame and also exterior panels)
- Wood glue
- Screwes
- L-Brackets
- Hinges and latch ( this is in case you need a thing door)
- Door sealant
Design and Measurements
- Size: It is very important to measure the size of your blender so that you build an enclosure that has enough clearance. Adding an extra space will make it easy to remove or put the blender.
- Shape: Choose the shape that best suits your preferences. The rectangular shape is the best because it is easy to build as well as maintain.
- Ventilation: You will also need to consider the ventilation system. You should choose one that has good ventilation to prevent overheating of the blender.
- Frame: Decide on the frame of your enclosure. A plywood or an MDF board are great options to create a frame. They are good to provide a good structure and support to the enclosure. Use a saw to cut into the right size.
- Panels: The next is to cut your absorbing materials and place them in the interior of the layers for the sound enclosure. It can be a fiberglass, acoustic blanket and more.
- Door: Some people prefer doors while others don’t like doors. Ensure you cut and take the right measurements for the door. When you choose a door, use a sealant to create a tight seal.
- Finish: This step is great to enhance the appearance of the enclosure. You choose to or not to apply a finish.
Construction Steps
- Select your materials: The first step is to choose your material, e.g acoustic foam or insulation. Also assemble your tools like saw, drill, screws and more.
- This step requires taking the measurements of your blender.Ensure you take accurate meamesure of the height, width and also depth.The measurement are very important because you will use them in determining the size of enclosure you will build.
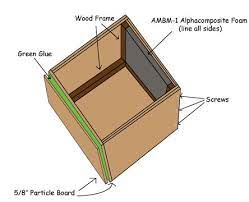
- Constrcuting the box. With mesurement you took in the second step, use them to cut the plywood or the MDF board. Yo will use them to form the sides, top, back and the side.
- After you are done cutting, assemble the pieces together with the help of drill, scew and nails. While you are doing this, make sure to leave an opening to allow the blender to enter.
- Once you are done, drill a few holes that will allow free flow of air.
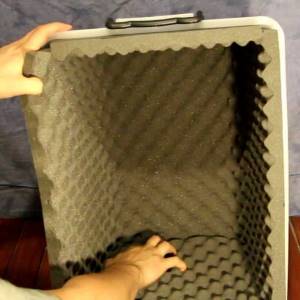
- Sound deadening material; This step will require to to use an acoustic foram or insulation to fill the interior of the box. This is the material that will abosrb the sound produced by the blender.
- After completing the above process, you can install a door. Here you can measure the entry point and cut the wood to fit. You can the attach hinges and handle knobs to make it easy to close and open the enclosure.
- The can be call the testing or examination step. This is where you put the blender into the enclosure and turn it to see whether it is effective. This is the step where you will be able to confirm whether the blender fits properly.
- You can finalise by add the finish that fits your preference.
Importance of a blender sound enclosure?
A blender sound has the following benefite:
- Noise reduction: Some blenders can be quite loud during operations and this may disrupt activities at home or in an office. The sound enclosure eliminates or reduces the noise level thereby enhancing a tolerable envirnoment.
- Comfort: Reducing the noise level can create a comfortable and enjoyable envirnoment.
- Health: Loud noise can have a negative impact on your health which may lead to loss of hearing, increases stress, affects sleep too. Reducing noise level, improves you health and well being.
- Improved productivity: A noise conducive environment allows people to carry out there activities or operations without distaurbance.
Related Article: Plastic Vs Glass: Which Blender Is Better?

Other ways to generate additional noise from your blenders
- Use of a sound proofing mat: A soundproofing mat is well designed to reduce the noise level of a blender by placing under the blender. It reduces the noise produced by the vibrations of the blender.
- Quieter blender: You can opt to use a a quieter blender that has produces low level of noise than other blenders. They usually have a lower decibel.
- Noise cancelling headphones or earplugs: If you are unable to find a way to reduce the noise levels of your blender, you can use the earplugs or noise cancelling headphones to protect you ears as well as reduce the effects of the noise.
- Sound enclosure: You can purchase a sound enclosure to help you reduce the noise level.
- Soundproof walls: You can sound proof the wall so that it prevents the leakage of noise.
- Hold you blender jar down: The noise leve of a blender is highly likely to amplified if the jar is not secured well. If you hold it jar firmly, the noise level will reduce significantly.
- Use a towel: Putting a towel under the blender will reduce vibrations of the blender hence reducing the level of noise.
- Position the blender: Put blender in a location the will favor the reduction of noise produced by the blender.
Frequently Asked Questions
- How do you muffle a loud blender?
You can muffle a loud blender by using a soundproof enclosure, towel or mat and a quiter blender. To add on top, you can also use short bursts to prevent contonous blends that will cause high noise levels.
- How do you vent a blender?
Does a quiet blender exist?
Blenders dont have air vent, but you can relieve them by letting them to cool and use short bursts
What decibel level is a blender?
Decibel level of blenders vary depending on the brand , size and also type. A standard blender can have 80-90 decibel while commercial blenders can have 100 decibels or more.
Related Article: Are vacuum blenders worth it?
Conclusion “ DIY Blender sound enclosure”
We can conclude by saying the DIY sound enclosure is a effective way to reduce the noise level of your blender. The cost involved is cheap and you will be able to cutomize the sound enclosure to your preference. It is also important to put vents on the enclosure to prevent the blender overheating. Design a good sized enclosure that will be convinient to use.


